To design effective closet shelf lighting, you’ll measure your space dimensions and evaluate shadow-prone zones, then map electrical outlets and calculate total fixture wattage to guarantee code compliance. Select LED strips or puck lights with 3000, 4000K color temperature delivering 200, 500 lumens per square foot, position them strategically to eliminate shadows, and integrate motion sensors with dimmer controls. Mount fixtures using low-profile channels, verify all electrical connections meet NEC standards, and establish routine maintenance protocols to maintain ideal illumination throughout your storage areas.
Assess Your Closet Layout and Lighting Needs
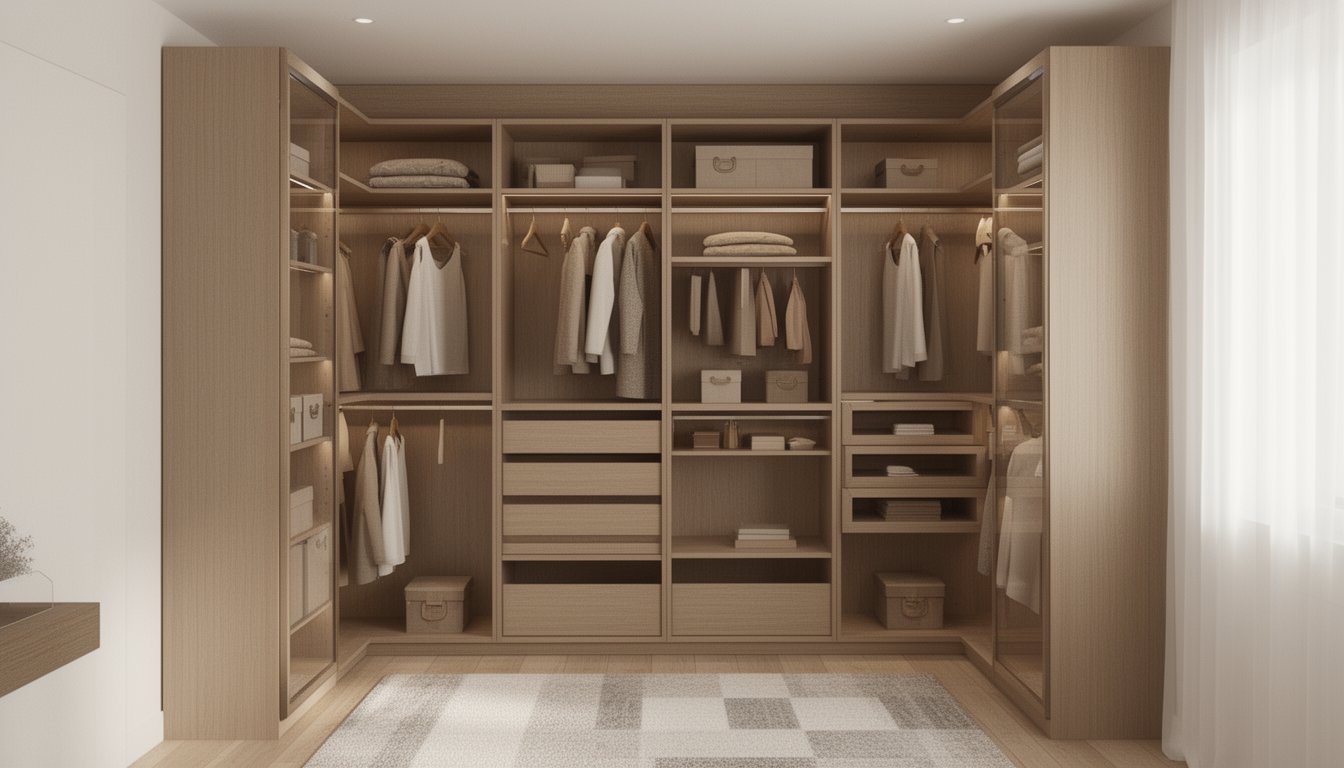
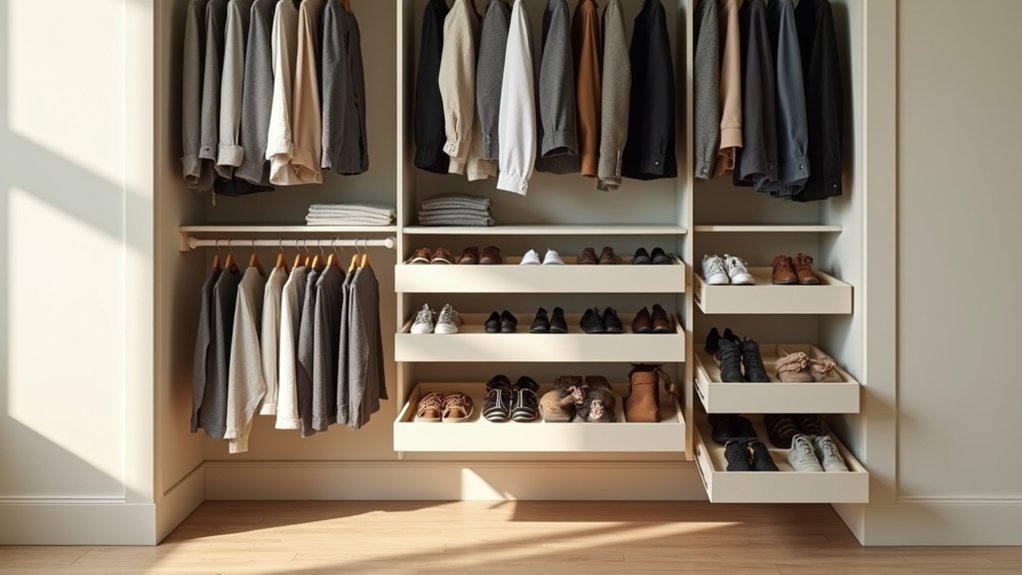
How effectively can you illuminate your closet without initial understanding its unique spatial characteristics and functional demands? Begin by measuring your closet’s dimensions and configuration. Walk-in spaces require grid-pattern recessed lighting, while reach-in closets need fixtures angled in the direction of the back. Evaluate natural light sources from windows, noting how seasonal variations and daily changes affect illumination consistency. Document your shelving layout; glass shelves optimize light reflection through multiple levels, whereas solid shelving demands targeted solutions. Identify shadow-prone areas behind hanging rods, in corners, and within deep storage zones. Analyze activity-specific requirements: dressing areas need face-height sconces, while jewelry displays require focused LED spots. Puck lights work exceptionally well over dressers or surfaces displaying watches and jewelry due to their focused beam pattern. Consider fixture placement that’ll maximize energy efficiency while accommodating future storage reconfigurations. Assess your desired light output in lumens to ensure adequate brightness for safely navigating shelves and accurately distinguishing between similar clothing colors and fabrics. Select a color temperature between 5000K-6500K if accurate color rendering is your priority for distinguishing between similar shades in your wardrobe. This exhaustive assessment establishes the foundation for your lighting design strategy.
Identify Power Sources and Electrical Requirements
Before installing closet lighting, you’ll need to map where outlets and electrical access points exist relative to your closet’s interior walls and ceiling. Calculate the combined wattage of all proposed fixtures to guarantee the circuit can handle the load without exceeding its amperage rating, typically 15 or 20 amps for residential branch circuits. Verify that your installation method and fixture placements comply with NEC Section 410.16 clearance requirements and local electrical codes to maintain both safety standards and legal compliance. Select luminaires with completely enclosed light sources to meet mandatory safety standards for clothes closet installations. Consider whether surface mounted LED fixtures or recessed options best suit your closet’s depth and ceiling configuration. Since lighting installation is not legally required in standard closets, you have flexibility in determining the extent and type of illumination based on your specific storage needs and budget.
Assess Existing Outlet Locations
When planning closet lighting installations, you’ll need to conduct a thorough electrical survey that maps every outlet, junction box, and power source within and adjacent to the space. Document wall and ceiling outlet positions relative to your planned shelf lighting points to minimize visible wire runs. Check for blank wall plates or empty backboxes indicating hidden wiring potential you can utilize. GFCI outlet requirements may apply depending on your closet’s proximity to water sources or local code amendments. Conduct a dedicated circuit assessment to determine if existing circuits can handle supplementary lighting loads without requiring new branch circuits. Identify accessible pathways through walls or ceilings for concealed wiring, noting structural obstacles like studs or beams. Verify whether existing outlet box mounted locations can accommodate surface-mounted closet fixtures that require 12-inch clearance from storage areas. Confirm that any recessed LED fixtures you’re considering have the necessary 6 inches clearance from storage elements to meet code requirements. This assessment establishes whether you’ll need surface-mount raceways or can integrate wiring discreetly within your closet’s framework.
Calculate Total Power Load
After mapping your electrical infrastructure, you’ll translate lighting design specifications into concrete power requirements by calculating the total wattage your closet system demands.
Determining Your Complete Power Profile:
- Sum individual fixture wattage across all planned shelf positions, accounting for power load variations between LED (4, 10W), fluorescent (higher consumption), and halogen options (15, 25W per fixture).
- Add control device consumption from dimmers, smart switches, and motion sensors, typically under 2 watts each but collectively significant in multi-fixture installations.
- Include transformer or driver overhead for low-voltage LED systems operating at 12V or 24V specifications.
- Apply light loss factor adjustments for environmental impact assessment, increasing initial wattage 15, 20% to compensate for dark finishes, shelving shadows, and long-term LED degradation.
Verify your total load remains within circuit capacity, 1,152W maximum for standard 15A circuits at 80% safety factor. Remember that wattage measures the electricity consumed by each bulb to produce its lumen output, making it essential for accurate power calculations. The 2024 IRC mandates that dimmers or motion sensors be installed for all permanently installed luminaires in habitable rooms to reduce energy consumption when lighting is too bright or spaces are unoccupied. For optimal results, select fixtures with higher lumens per watt efficiency ratings to maximize brightness while minimizing energy consumption and reducing strain on your electrical circuit.
Verify Circuit Safety Standards
Once you’ve established your closet’s total power load, translate those calculations into actionable safety compliance by verifying that your electrical infrastructure meets National Electrical Code standards and local jurisdiction requirements. Confirm your circuit breaker or fuse ratings align with wire gauge specifications; 14 AWG requires 15A protection, while 12 AWG accommodates 20A circuits. Verify the presence of an accessible neutral wire, essential for LED and smart lighting controls. Guarantee all connections reside within approved electrical boxes and that wiring routes avoid physical damage zones within storage areas. Schedule electrical safety testing to confirm proper grounding and secure terminations before energizing circuits. Ensure all closet fixtures are fully enclosed light fixtures, as exposed bulbs are prohibited by code to prevent heat hazards and falling glass injuries. Maintain safe distance between fixtures and stored items to comply with clearance requirements and reduce fire risk. Arrange qualified inspector review to validate code compliance, particularly regarding fixture clearances, wiring methods, and circuit protection devices, ensuring your installation meets all mandatory safety benchmarks.
Choose the Right LED Lighting Type for Your Shelves
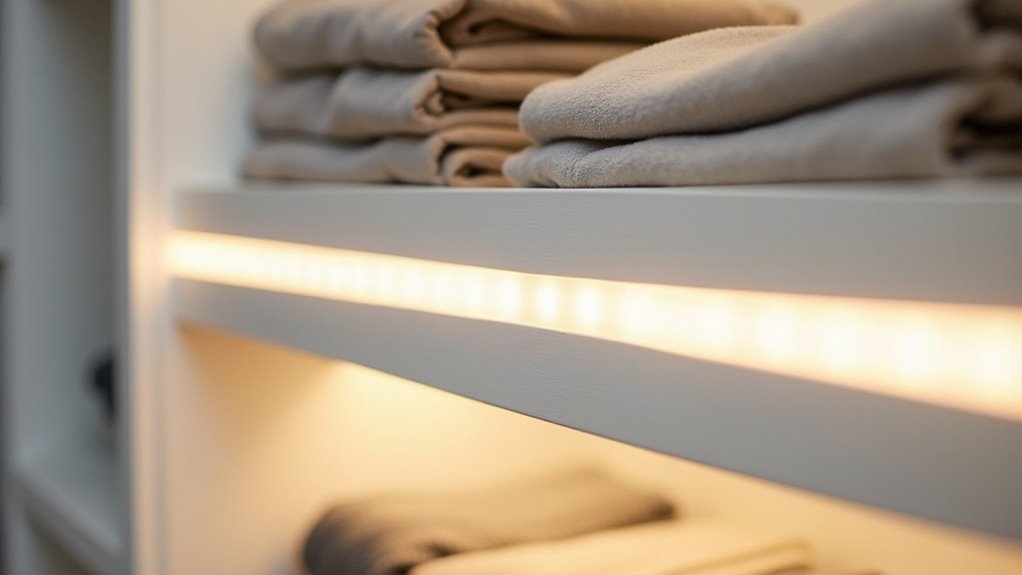
When lighting closet shelves, you’ll need to decide between strip lights for continuous, even illumination or puck lights for focused accent beams on specific items. Your mounting approach, recessed or surface-mounted, will depend on whether you can route channels into the shelf material or must attach fixtures to existing surfaces. Strip lights with self-adhesive backing eliminate the need for drilling or complex hardware, allowing you to simply peel and stick the lighting directly onto clean shelf surfaces. Consider whether you want under-shelf or over-shelf lighting, as under-shelf placement illuminates items from above with fewer shadows while over-shelf positioning creates contrast that makes objects stand out. Each combination of light type and mounting method creates distinct visual effects and installation requirements that directly impact both your closet’s functionality and aesthetic integration.
Strip vs. Puck Lights
Selecting between strip and puck lights fundamentally shapes how you’ll illuminate your closet shelves and display items. Strip lights deliver continuous, uniform coverage ideal for thorough shelf illumination, while puck lights create focused beams that excel at highlighting specific zones or accessories. Understanding their distinct characteristics helps you make informed design aesthetic considerations:
- Light Distribution Pattern: Strips eliminate shadows across entire surfaces; pucks produce spotlight effects with distinct dark zones between fixtures.
- Installation Requirements: Strips use adhesive backing for quick mounting; pucks typically require screws or mounting rings for secure placement.
- Energy Efficiency Comparisons: Strips provide broader coverage per watt; multiple pucks may consume more power for equivalent illumination area.
- Application Flexibility: Combine both types to layer ambient (strip) and accent (puck) lighting for improved visual depth and functionality.
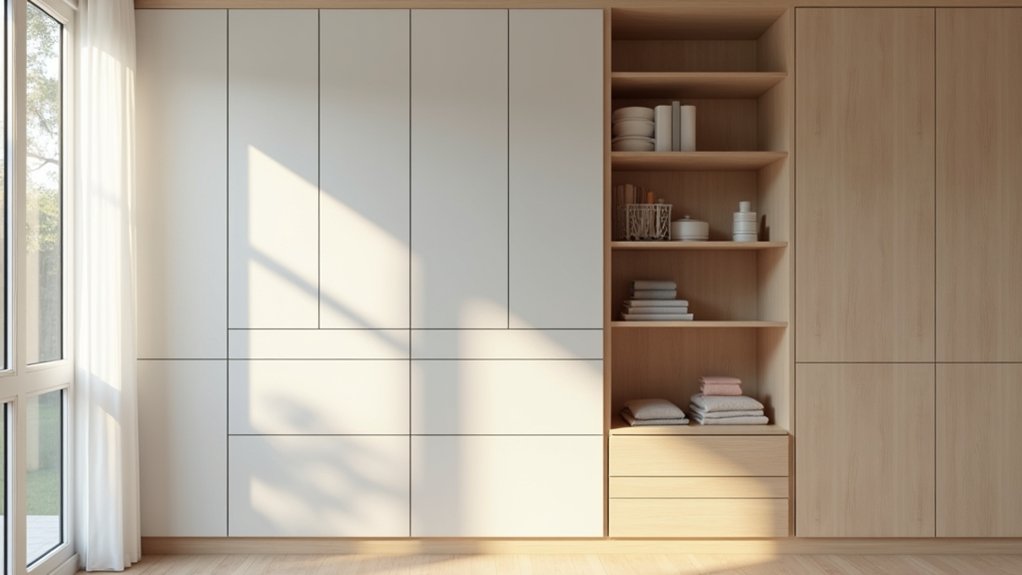
Recessed or Surface-Mounted
While strip and puck lights address what illuminates your shelves, the mounting method determines how seamlessly those fixtures integrate with your closet’s architecture. Recessed LEDs provide uniform ambient lighting with minimal visual intrusion, though they require precise cutting and wiring during installation. You’ll need adequate ceiling thickness and compliance with fire safety codes, making them suitable for new construction rather than retrofits. Surface-mounted fixtures offer superior installation flexibility, particularly in rentals or low-clearance spaces where cutting isn’t feasible. They excel at task lighting, delivering focused illumination on specific shelves with strategic placement. Budget considerations typically favor surface-mounted options due to lower installation costs, though energy efficiency tradeoffs remain comparable between both methods. For ideal results, you can layer both mounting types, recessed for general illumination, surface-mounted for accent lighting on priority storage zones.
Determine Optimal Placement to Eliminate Shadows

Strategic fixture placement forms the foundation of shadow-free closet illumination, requiring careful analysis of your space’s geometry and storage configuration. You’ll need to identify shadow patterns through systematic testing before installing permanent fixtures.
Assessment and placement protocol:
- Conduct shadow analysis: Observe natural light patterns with your closet door open on a sunny day, then use a flashlight in darkness to pinpoint areas where beams don’t penetrate effectively.
- Position recessed fixtures just inside the closet opening, angled in the direction of the back wall to eliminate depth shadows.
- Implement multi-tiered illumination by combining overhead fixtures with LED strip lighting under shelves and along vertical surfaces.
- Measure light levels using a light meter, targeting 10-20 foot-candles for general areas and 20-50 foot-candles for task zones.
Select Appropriate Color Temperature and Brightness Levels
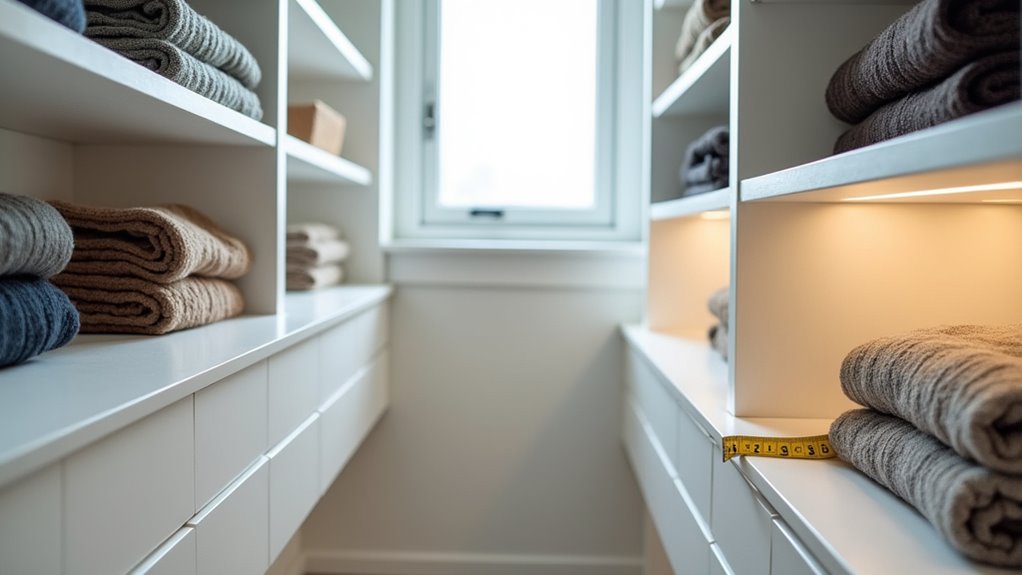
Once you’ve positioned your fixtures to eliminate shadows, the spectral quality and intensity of that light become just as significant factors in closet functionality. Target a color temperature range of 3000, 4000K to guarantee accurate fabric color perception without harsh or yellowish distortion. A 3500K setting offers the most neutral compromise for general applications. Pair this with 200, 500 lumens per square foot, adjusting higher for walk-in closets with dressing zones and lower for compact reach-ins. Prioritize LEDs with a color rendering index of 80 or above, preferably 90+, to distinguish subtle hues in clothing and accessories. Integrate dimmers and CCT-tunable fixtures to provide user adjustability, accommodating personal preferences and evolving closet layouts while maintaining ideal visual clarity across varied tasks.
Pick Fixtures With Proper Profiles and Diffusers
Because closet shelves often sit close to walls and adjacent storage units, fixture profile selection directly determines how much usable space you retain while achieving adequate illumination.
Low-profile and corner-mount aluminum channels minimize obstruction while acting as heat sinks to prolong LED lifespan. Diffuser choice substantially impacts lighting quality:
- Frosted polycarbonate or PMMA diffusers eliminate LED hotspots and create a uniform appearance across all shelves.
- Arc-shaped or lens diffusers adjust beam spread, directing light onto garments without glare.
- Clear diffusers maximize brightness but sacrifice uniformity, reducing color rendering accuracy when selecting clothing.
- IP65-rated diffusers protect strips from moisture and accidental contact with fabrics.
Modular profiles in standard 1m or 2m lengths allow on-site cutting, while mounting clips and end caps simplify installation and prevent dust infiltration, ensuring consistent performance throughout daily use.
Integrate Motion Sensors and Automation Features
Motion sensors transform passive closet lighting into responsive systems that activate automatically when you enter and deactivate after a preset interval. Strategic placement at door thresholds or main access points guarantees reliable detection within the typical 15-foot range and 100-degree coverage area of consumer-grade sensors. Smart control integration extends these capabilities through adjustable timers, brightness scheduling, and voice command functionality that adapts to your usage patterns and preferences.
Motion Sensor Placement Options
Strategic sensor placement determines whether your closet lighting activates reliably or triggers unnecessarily from hallway traffic. You’ll achieve optimal performance by considering both sensor detection ranges and sensor power sources during installation planning.
Key Placement Strategies:
- Entryway Mounting, Install sensors at shoulder or head height above the door frame to capture immediate motion while excluding hallway activity outside your closet boundaries.
- Under-Shelf Integration, Mount compact wireless sensors directly beneath shelves or along closet rods for targeted illumination of hanging garments and stored items without shadows.
- Ceiling Installation, Position sensors overhead in walk-in closets for comprehensive coverage across the entire footprint, minimizing obstruction from clothing or shelving.
- Adjustable Angles, Tilt sensors strategically for sliding or bifold doors to guarantee detection regardless of which door section opens first.
Smart Control System Setup
When you integrate motion sensors with smart automation systems, your closet lighting transforms from a basic utility into a responsive environment that adapts to your daily routines. Begin by selecting a central hub, Home Assistant, SmartThings, or Hubitat, that guarantees device compatibility across Zigbee, Z-Wave, and WiFi protocols. Pair contact sensors at door frames with dimmable smart bulbs positioned above shelf zones to create trigger-based illuminations.
Configure platform automations with multi-trigger logic: lights activate on door opening, remain illuminated during motion detection, and auto-shutoff after preset intervals of inactivity. Program scenes for time-based brightness adjustments, brighter output during morning preparations, subdued ambiance for evening access. Enable manual overrides through wall switches or smartphone apps for user flexibility.
Complete routine testing across all sensor positions, verifying response times and eliminating false triggers before finalizing your installation.
Install Dimmer Switches and Zone Controls
Dimmer switches and zone controls transform a basic closet lighting system into a customizable environment that adapts to different tasks and times of day. You’ll achieve ideal functionality by installing dimmers strategically throughout your space, following proper electrical safety protocols. Turn off power at the circuit breaker before beginning installation work.
Installation sequence for zone-based dimming:
- Connect ground wires first using wire connectors twisted clockwise, ensuring no bare filaments remain exposed outside connections
- Attach dimmer wires to house wiring according to manufacturer specifications, wrapping connections with electrical tape for additional safety
- Program dimmer schedules for automatic brightness adjustment during morning versus evening access periods
- Test each zone independently through full brightness range, verifying energy efficiency considerations align with your lighting design objectives
Mount and Secure Your Lighting System Properly
After configuring your dimmer switches and zone controls, you’ll need to physically mount the lighting fixtures to create a stable, long-lasting installation. Choose adhesive-backed LED strips for drill-free mounting on most shelf surfaces, ensure they’re clean and dry to maximize adhesion. For wooden shelves requiring enhanced stability, drilling and clipping provides superior securement, though you should avoid this method on glass or marble to minimize shelf damage. Position strips along front edges to eliminate shadow casting from rear placement. Map wiring routes behind moldings or inside walls to conceal connections. Secure all electrical junctions with manufacturer-recommended connectors and install junction boxes for hardwired systems. Use appropriate wire gauge and transformers for low-voltage applications. Test motion sensors and door switches post-installation to verify ideal triggering angles and coverage zones.
Establish a Routine Maintenance Schedule
Because closet lighting systems operate in confined spaces with frequent on-off cycles, they require structured maintenance protocols to sustain ideal performance and longevity. You’ll need to track maintenance history through a dedicated logbook or digital record, documenting each inspection, cleaning, and component replacement with dates and observations. Harness seasonal routines by aligning deep fixture cleaning with spring and fall schedules for maximum efficiency.
Implement this maintenance framework:
- Weekly: Dust fixtures and diffusers using soft cloths to maintain perfect light output
- Monthly: Inspect bulbs for dimming or flickering; verify electrical connections on LED strips
- Semiannual: Deep-clean all fixture components and check motion sensors for proper operation
- Annual: Schedule professional electrical inspections for code compliance and safety verification
Frequently Asked Questions
Can Closet Lighting Be Retrofitted in Rentals Without Permanent Electrical Modifications?
Yes, you can retrofit closet lighting without permanent modifications using battery-powered or plug-in fixtures with adhesive or magnetic mounts. You’ll achieve damage-free installation by selecting LED strips, puck lights, or motion sensor activation units that require no hardwiring. Wireless control options include USB-rechargeable models, remote-operated systems, and smart bulbs compatible with voice assistants. You can position fixtures strategically on shelves and rods, ensuring ideal illumination while maintaining compliance with rental agreements and preserving your security deposit.
How Do You Prevent LED Strip Adhesive From Damaging Shelf Finishes?
You’ll protect shelf finishes by cleaning surfaces thoroughly before installation and applying a barrier layer of low-tack tape between the LED strip and wood. Choose wall-safe adhesives rated for delicate surfaces, or opt for mechanical clips that eliminate adhesive contact entirely. When relocating strips, employ proper adhesive removal techniques: peel slowly at low angles, then use isopropyl alcohol to dissolve residue. Always test adhesives on hidden areas first to verify compatibility with your specific shelf finish protection requirements.
What Backup Lighting Options Work During Power Outages in Closets?
You’ll find battery-powered LED strips and motion-activated backup lights most practical for closet outages. Install rechargeable motion sensors on ceiling positions or upper shelf edges; they’ll activate automatically when you approach, conserving power between uses. For extended runtime, mount rigid LED bars powered by 8-D-cell packs along sidewalls or under-shelf locations. While generator-powered lighting can restore hardwired fixtures, battery solutions offer immediate, independent illumination without external infrastructure dependencies during prolonged outages.
Are Battery-Powered LED Systems Reliable for Long-Term Closet Shelf Lighting?
Battery-powered LED systems offer moderate reliability for closet shelf lighting, though they’re better suited for supplemental rather than primary illumination. You’ll achieve ideal performance by selecting fixtures with motion sensor activation to minimize runtime and extend battery intervals. While energy efficiency ratings for LED modules remain excellent, frequent battery replacement creates maintenance demands that compromise long-term viability. For dedicated closet lighting, you’ll find hardwired systems more dependable, reserving battery-powered options for temporary installations or backup scenarios.
How Do You Sync Closet Lighting With Existing Smart Home Systems?
You’ll sync closet lighting through your smart home hub by selecting compatible protocols like Zigbee, Z-Wave, or Wi-Fi for your devices. Install motion activated sensors near entry points to trigger lighting control integration automatically. Connect your smart bulbs or switches to platforms like Home Assistant or SmartThings, then create automations linking sensor events to light responses. Configure custom rules for dimming levels and timeout periods, ensuring your closet lighting responds seamlessly to occupancy within your existing ecosystem.