To make custom closet doors at home, you’ll need to start with precise measurements of your opening, including width at top and bottom, height on both sides, and diagonal spans. Choose your door style and materials based on traffic patterns and aesthetics. Gather essential tools like a tape measure, drill, miter saw, and clamps. Cut panels to size, build the frame structure, mount hardware, sand surfaces, apply finishes, and make final adjustments. This thorough process guarantees professional-quality results when executed with attention to detail.
Getting Started: Essential Planning and Measurements
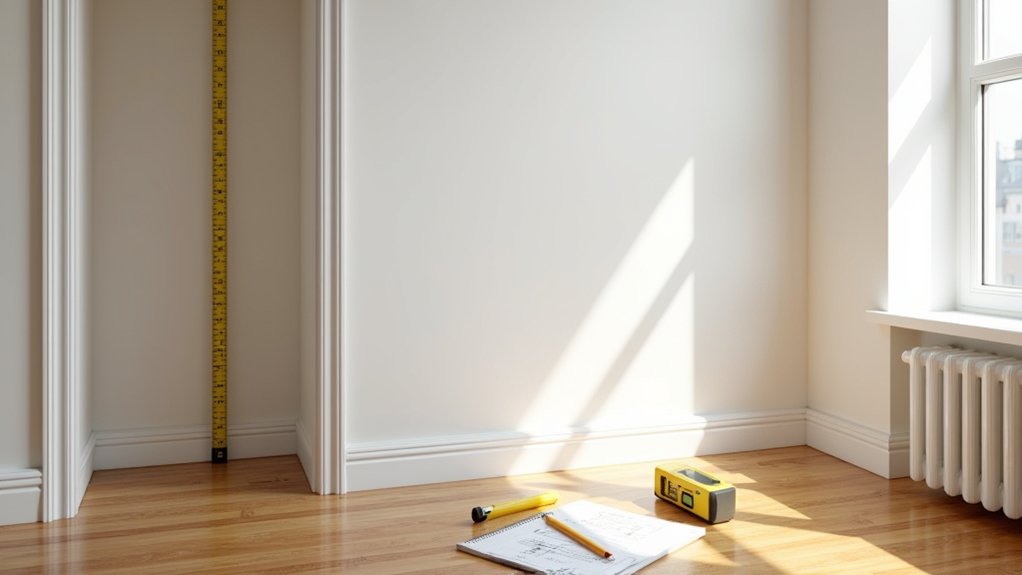
Three critical steps form the foundation of any custom closet door project: accurate measurements, space evaluation, and proper planning. Start by using a steel tape measure to record the opening’s width at both top and bottom positions, measuring to the nearest 1/8 inch. You’ll need to check both left and right heights, as frames often aren’t perfectly level. If you encounter any issues accessing online measurement guides, you may need to contact site owners for technical support.
For precise measurement techniques, take diagonal measurements across the opening – if they differ by more than 1/2 inch, you’ll need to address this before installation. Key installation tips include checking for obstructions like switches or vents, and ensuring you’ve got adequate clearance for your chosen door style. Consider bifold and pivot door styles when planning your measurements. Remember to measure the existing trim dimensions and verify floor-to-ceiling uniformity, as irregularities can impact the final fit of your custom doors. Most installations are straightforward DIY projects that can be completed with basic tools and video guidance.
Choosing Your Door Style and Design
When selecting custom closet doors, you’ll need to evaluate key design elements, including modern, traditional, or designer styles across more than 150 available models to match your interior aesthetic. Your material choice, whether wood for classic durability, aluminum for contemporary appeal, or glass for spatial enhancement, will considerably impact both functionality and visual integration with your space. The final selection of hardware components and operational mechanisms, from sliding tracks to hinges and handles, must align with your daily usage patterns while complementing your chosen design style. Mirrored surfaces can create an illusion of expanded space while enhancing natural light distribution throughout the room. Light shades like Polar White finish options visually maximize room dimensions while providing a fresh, contemporary appearance. Our revolutionary 3D technology enables precise measurements and customization to ensure your new doors fit perfectly within your existing space.
Design Styles and Options
Selecting the right closet door design requires careful consideration of both aesthetic preferences and practical requirements. Current design trends range from sleek modern installations to rustic barn door aesthetics, each offering unique visual appeal and functionality. You’ll find that door aesthetics greatly impact your room’s overall ambiance while serving essential storage needs. Some designs, like louvered slats provide natural ventilation to keep stored items fresh. With today’s patented cam-hinge technology, bifold doors can fold almost completely flat against walls to maximize space. Custom solutions can provide a 69% ROI for homeowners looking to increase their property value.
- Modern designs feature clean lines with mirrored or metallic finishes, often incorporating sliding mechanisms for space efficiency
- Traditional styles embrace classic wood finishes and paneled configurations, typically seen in French or bifold arrangements
- Contemporary options blend unique patterns with glass inserts and compound materials for designer appeal
- Minimalist approaches utilize flat panels and concealed hardware for a streamlined appearance
Your choice of materials, hardware, and finishing touches will determine both the door’s functionality and its contribution to your room’s design scheme.
Material Selection Guidelines
The foundation of any custom closet door project lies in choosing appropriate materials that align with your specific needs and environment. When evaluating options, consider your space’s traffic patterns and sustainability considerations alongside your cost analysis.
For high-traffic areas, select solid wood or plywood for superior durability, though you’ll need to factor in maintenance requirements. If you’re working with a limited budget, hollow core doors offer practicality for low-traffic spaces, while MDF presents a cost-effective middle ground with excellent paint adhesion. Consider certified plywood or engineered wood products for eco-conscious builds, as they utilize resources efficiently. For modern design aesthetics, synthetic material doors provide extensive customization options in colors and finishes. Glass doors can add sleek elegance while brightening your closet space. Installing pocket doors can maximize available space by sliding into wall cavities.
Evaluate your local climate conditions too; metal resists moisture in humid spaces, while solid core doors provide better sound insulation for bedroom closets. Match your material choice to both functional requirements and long-term maintenance capabilities.
Hardware and Functionality
Four primary door mechanisms define the core functionality of custom closet systems: sliding, bi-fold, bypass, and barn door configurations. When selecting your door style, hardware compatibility and functionality factors will determine your closet’s accessibility and long-term performance. Modern designs feature concealed hardware for a more sophisticated appearance.
- Sliding doors utilize double or triple track systems, offering 50-67% access depending on panel configuration. Quality rollers with nylon wheels ensure smooth, quiet operation.
- Bi-fold mechanisms require pivot pins and quality hinges, folding into a compact 5.5″ space while providing full access
- Bypass doors operate on parallel tracks, ideal for tight spaces with minimal swing clearance requirements
- Barn doors mount externally on exposed tracks, requiring sufficient wall space adjacent to the opening
Your hardware selection must align with your chosen configuration, from box rail systems for enhanced stability to specialized pocket door hangers for in-wall installations. Consider handle styles that complement your design while ensuring smooth operation. For heavier custom doors exceeding 400 pounds, selecting heavy-duty hardware is essential for safe and reliable long-term performance.
Gathering Required Tools and Materials
Before starting your custom closet door project, you’ll need specific tools, including a tape measure, drill, screwdriver set, miter saw, and clamps for precise assembly and installation. You’ll want to source primary materials such as plywood or MDF panels, along with necessary hardware components like hinges, tracks, or bifold door kits, based on your chosen door style. For finishing touches, make certain you’ve gathered trim pieces, paint or stain, appropriate fasteners, and protective sealants that match your design specifications. A PVC lattice molding can be used to create decorative patterns and enhance the door’s visual appeal.
Essential Tools Checklist
Creating custom closet doors requires an extensive set of specialized tools that assure precise measurements, clean cuts, and professional assembly. Before beginning your project, confirm proper tool maintenance and follow essential safety practices to protect yourself while working.
- Keep measuring and layout tools calibrated, including your tape measure, speed square, and level, as precision is vital for proper door fit
- Maintain sharp blades on cutting tools like your circular saw, miter saw, and router to achieve clean, splinter-free cuts
- Check that your drill/driver, nail gun, and other power tools are in ideal working condition with fully charged batteries
- Organize your workspace with all safety equipment readily available; safety glasses, ear protection, a dust mask, and work gloves must be worn during operation
Materials Shopping Guide
Now that your tools are ready, selecting the right materials becomes your next priority in crafting custom closet doors. Start by choosing your core door panel type: plywood offers durability and warp resistance, while MDF provides a smooth surface ideal for painting. For budget-conscious projects, consider hardboard or particleboard with proper edge sealing.
Select your custom finishes based on both aesthetics and functionality. Wood veneers deliver natural appeal at a lower cost than solid wood, while laminates offer superior durability and endless pattern options. Don’t forget essential hardware components; you’ll need sliding track kits or heavy-duty hinges depending on your door style, plus appropriate mounting screws and brackets rated for your panel weight. Remember to purchase caulk and sealants to protect against moisture intrusion and guarantee longevity.
Precise Panel Cutting and Preparation
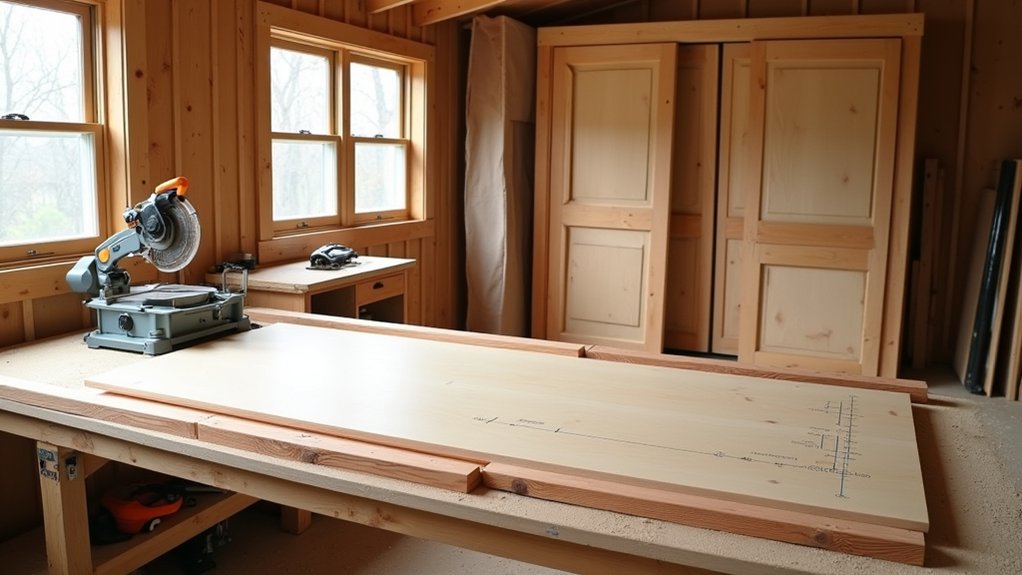
When undertaking custom closet door construction, precise panel cutting and preparation serve as the foundation for professional-looking results. You’ll need to master accurate panel measurements and cutting techniques to achieve an ideal fit and functionality. Start by measuring your opening to the nearest 1/16 inch, accounting for standard clearances of 1/8 to 3/16 inch at top and sides.
- Use fine-tipped pens rather than pencils for marking cutlines to guarantee precise reference points
- Set up your circular saw with a fine-tooth blade and proper depth setting for clean, controlled cuts
- Support panels on a level surface with protective backing to prevent damage during cutting
- Secure panels firmly with clamps and utilize straight-edge guides to maintain consistent, accurate cuts
Test-fit your panels before proceeding to the final finishing steps, making minor adjustments as needed.
Building the Door Frame Structure
You’ll need to precisely measure and cut your frame’s rails to match your closet opening dimensions, accounting for a 1/8″ to 3/16″ reveal on all sides and subtracting for hardware clearances. For ideal frame assembly, select straight-grained, defect-free lumber that’s been properly acclimated, cutting your stiles and rails to 4-5 1/2 inches in width to guarantee adequate structural support. Before final assembly, dry-fit your frame components using your chosen joinery method; whether mortise-and-tenon, dowel, or pocket-hole construction, to verify square alignment and proper fitment.
Measuring and Cutting Rails
Building accurate door frame rails starts with precise measurements of the closet opening. You’ll need to measure width at three points and height at both sides, using the smallest dimensions to guarantee a proper fit. For ideal rail alignment techniques, check diagonal measurements to confirm squareness; any difference exceeding ½ inch requires compensation during cutting.
- Select rail material matching your door thickness (¾” to 1″ for custom frames) and mark cut lines precisely
- Implement cutting precision methods using a miter saw or circular saw for clean, splinter-free edges
- Maintain consistent width for top and bottom rails, with slightly wider stiles for structural integrity
- Pre-drill screw holes and sand all cut edges before assembly to prevent splitting and guarantee smooth joints
Consider any structural irregularities and adjust your cuts accordingly for a perfect fit.
Frame Assembly Tips
Three critical principles govern successful closet door frame assembly: proper alignment, strategic shimming, and secure fastening. Begin by checking your floor’s level, adjusting the frame base for deviations up to 1/8″. Position the frame flush against the wall, then verify plumbness using a level.
Strategic shim placement is essential for maintaining consistent reveals around the door. Install shims at multiple points, top, middle, and bottom, on both hinge and striker sides. Don’t over-tighten, as this can deform the frame. Secure the frame with initial tack nails at key points, then check frame alignment before final fastening.
Test the assembly by opening and closing the door repeatedly. You’ll need to maintain parallel alignment of tracks for sliding systems, ensuring all hardware components are properly seated and adjusted.
Panel Assembly and Reinforcement
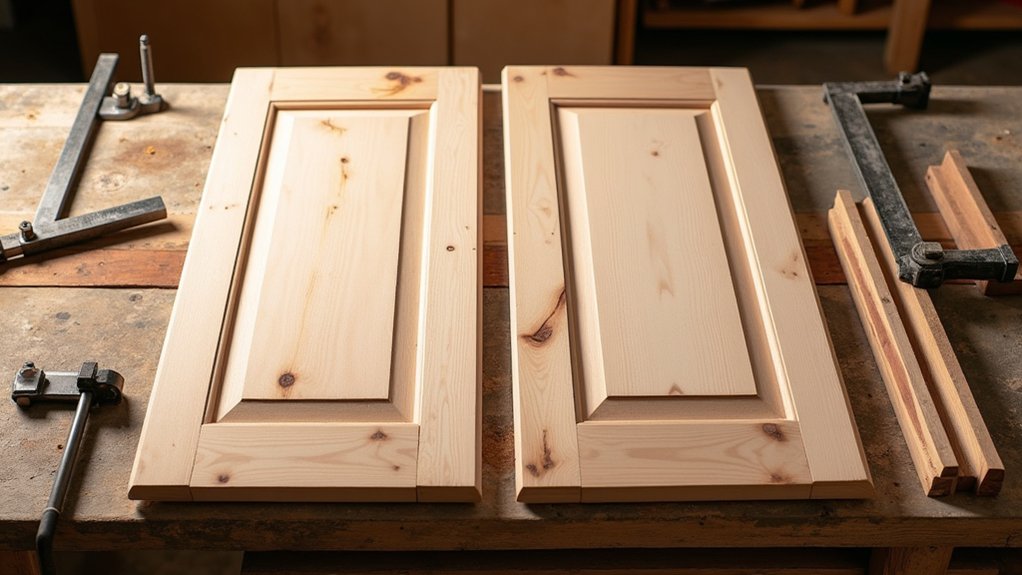
When constructing custom closet doors, proper panel assembly and reinforcement form the foundation of a durable installation. You’ll achieve peak panel durability and joint integrity through a two-layer construction method, combining plywood substrate with decorative planking. Surface treatment and design flexibility come from careful material selection and precise fastening techniques.
- Cut panels 1/8″ to 3/16″ smaller than the frame opening, allowing for proper clearance and preventing binding
- Apply edge reinforcement using 4″ trim boards around the perimeter to distribute impact stresses
- Verify material bonding by applying glue to all mating surfaces before implementing proper clamping pressure
- Strengthen the assembly by routing mortise and tenon joints where rails meet stiles, and secure panels using concealed screws through the top layer into the substrate
Hardware Selection and Mounting
Proper hardware selection and mounting techniques determine the long-term functionality of your custom closet doors. Choose hardware types based on your door’s weight, thickness, and intended operation. For sliding doors, you’ll need either top-mount or side-mount hangers rated for your panel weight, while bifold systems require specific pivot hardware.
| Hardware Type | Weight Capacity | Mounting Options |
|---|---|---|
| Sliding Bypass | 200-400 lbs | Top/Side Mount |
| Bifold | 165 lbs | Pivot Points |
| Soft-Close | Up to 165 lbs | Track-Integrated |
When mounting, verify your fasteners match the frame material: wood, metal, or MDF. For sliding systems, consider I-beam tracks for commercial-grade durability or rolled steel for residential use. Confirm that backset measurements (2 3/8″ or 2 3/4″) align with your chosen hardware, and check fire rating compatibility if required.
Surface Preparation and Sanding
Achieving a flawless finish on custom closet doors requires meticulous surface preparation and systematic sanding techniques. Before you begin, remove all contaminants and inspect for imperfections that need filling. Once repairs are complete, implement proper surface cleaning with a damp cloth and allow thorough drying.
- Start with medium-grit (120-180) sandpaper, progressing to finer grits (220-320) for a smooth finish
- Sand consistently with the wood grain to prevent visible scratches
- Remove dust thoroughly between coats using a vacuum or tack cloth
- Apply primer uniformly across all six door surfaces, including edges
Work in a controlled environment (15-25°C) with adequate ventilation and lighting. You’ll need professional-grade sandpaper and brushes for best results. Remember to let each coat dry completely before progressing to maintain long-term durability.
Applying Paint or Stain Finishes
The successful application of paint or stain finishes on custom closet doors demands three critical decisions: selecting the appropriate finish type, choosing ideal application tools, and implementing proper coating techniques.
For paint types, you’ll need to determine whether your door is paint-grade or stain-grade. Paint-grade doors work best with opaque finishes, while stain-grade doors showcase natural wood grain. Select high-quality brushes for detailed work, or consider sprayers for professional-level coverage. When applying stain techniques, use rags or sponge applicators for even penetration.
After your base coat, apply two layers of polyurethane topcoat for durability. You’ll achieve excellent results using water-based finishes for clarity and oil-based options for deeper protection. Don’t forget to seal all edges, including top and bottom, to prevent moisture damage and warping.
Final Installation and Adjustments
Successfully installing custom closet doors requires meticulous attention to positioning, alignment, and hardware placement. When mounting your doors, you’ll need precise measurements and proper alignment techniques to guarantee smooth operation and professional results.
- Start by measuring multiple points along the closet frame to identify irregularities, then install tracks or hinges according to manufacturer specifications.
- Target specific gap measurements: 5/16″ at jambs, 1/8″ between bifold sections, and 1/4″-7/16″ at the top.
- Install pulls and knobs only after confirming proper door alignment, typically positioning them 1/3 of the width from the hinge side.
- Apply troubleshooting tips as needed: adjust rollers for sliding doors, use hinge adjustment slots for rubbing issues, and fine-tune track heights until doors operate smoothly.
Verify all clearances and test door operation thoroughly before securing final hardware components.
Frequently Asked Questions
Can I Make Custom Closet Doors Without a Workshop or Garage?
Yes, you can construct custom closet doors in compact living spaces using basic DIY tools and space saving techniques. You’ll need a flat work surface like a table or floor, along with essential hand tools: measuring tape, drill, saw, and stapler. Work with lightweight materials such as thin plywood or MDF panels, and utilize modular assembly methods. Pre-cut materials from home improvement stores further minimize workspace requirements while maintaining project feasibility.
How Long Does a DIY Closet Door Project Typically Take?
You’ll need to plan for a 1-3 day project timeline, depending on your chosen design complexity. Basic panel assembly takes 2-4 hours, while finishing steps like painting or staining add another 2-5 hours. For effective time management, allocate 1-2 hours for initial measuring and planning, 1-2 hours for cutting materials, and 1-2 hours for final installation. First-time DIYers should factor in additional hours for potential adjustments and learning curve.
What’s the Average Cost Savings Compared to Buying Pre-Made Doors?
You’ll typically save 40-75% on your closet door project through DIY compared to pre-made options. In a cost comparison, while pre-made doors run $200-$670 installed, your DIY materials might only cost $100-$500 total. Budget considerations should factor in that you’re avoiding $200-$600 in professional installation fees per door. Even with premium materials, you’ll stay well under the $1,000-$3,500 price tag of professionally custom-made doors.
Can Existing Closet Doors Be Repurposed Into a New Design?
Yes, you can transform your existing closet doors through multiple repurposing materials and techniques. You’ll find versatile options like converting bifolds into barn doors, adding decorative trim for a paneled look, or inserting glass panels for design inspiration. You can also repurpose doors into furniture pieces like desktops or room dividers. Through sanding, painting, and hardware updates, you’ll achieve custom looks while maintaining structural integrity and reducing waste.
Are Custom Closet Doors Suitable for Rental Properties?
Yes, custom closet doors can be highly suitable for rental properties when you prioritize durability and compliance with rental regulations. You’ll need to select materials that withstand frequent tenant turnover while maintaining aesthetic appeal. Consider installing sliding bypass or bifold systems, as they offer minimal maintenance requirements and proven longevity. However, you’ll want to guarantee your custom designs meet fire safety codes and accessibility standards specific to rental units.

