Motion sensors work by detecting your body’s infrared heat signature within a 120° range, automatically triggering closet lights when you enter and shutting them off after a preset delay. You’ll achieve 25-75% energy savings while eliminating the fire risk of forgotten lights. Installation involves either battery-powered stick-on units or hardwired fixtures connected to standard electrical boxes. Proper sensor placement above the door frame guarantees ideal coverage, while adjustable sensitivity settings prevent false triggers from nearby movement. Strategic positioning and timer adjustments optimize both safety and efficiency throughout your home.
Understanding Motion Sensor Technology for Closet Applications
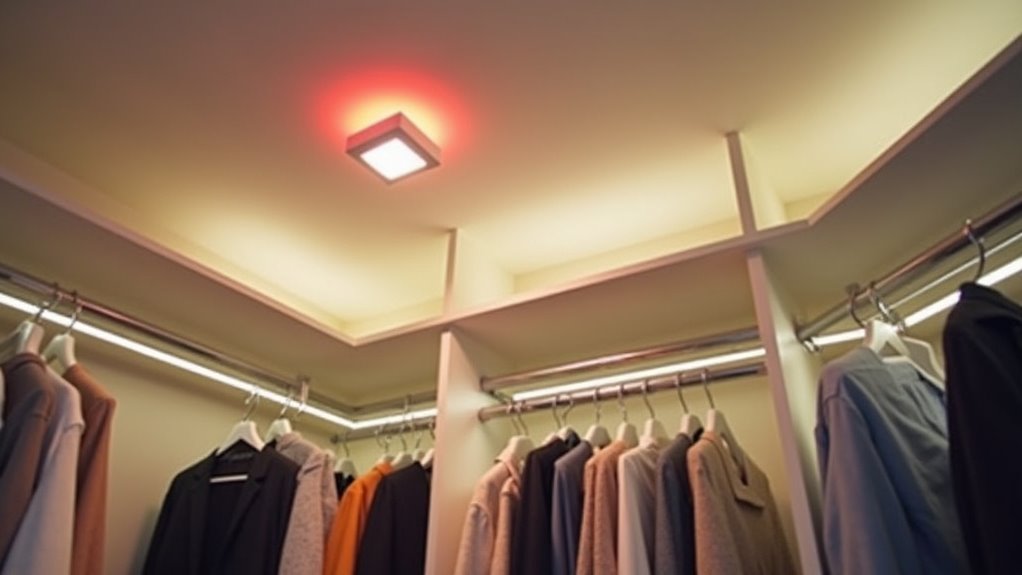
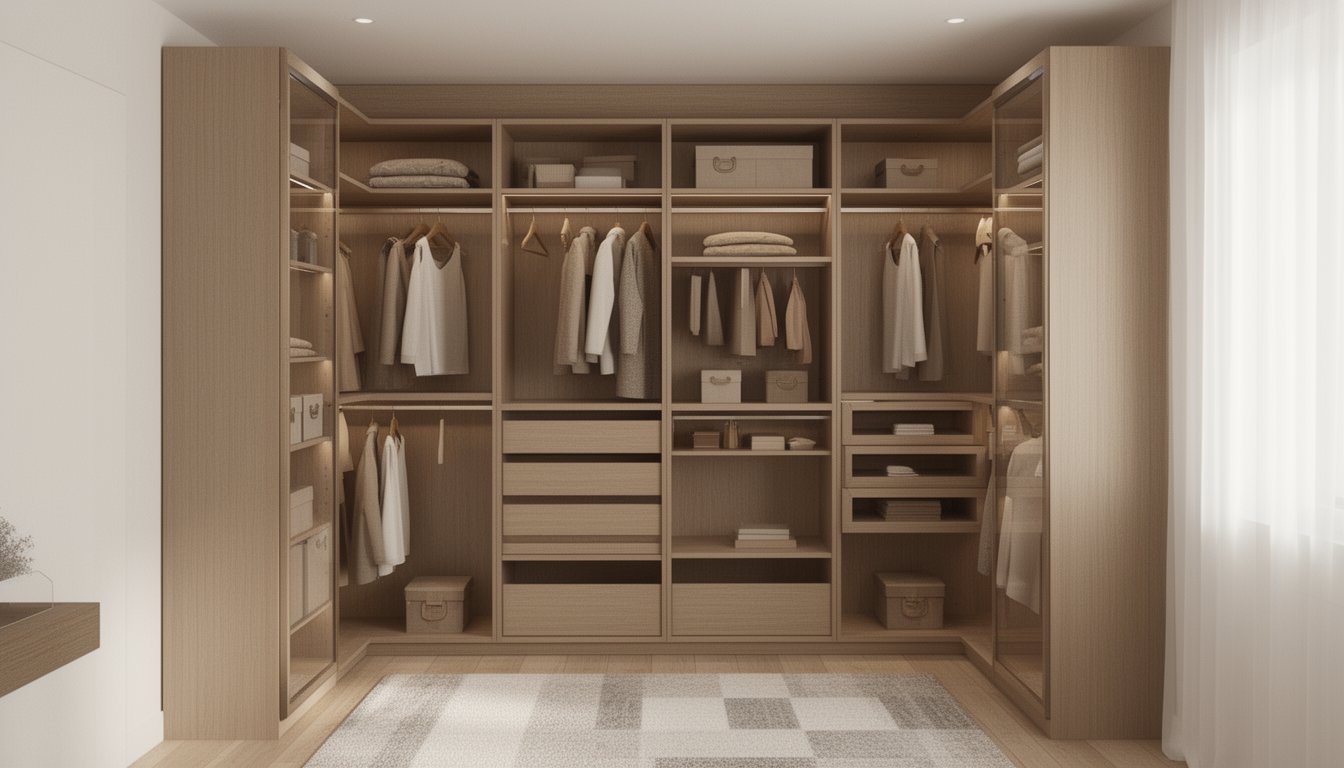
When selecting motion sensor lighting for closet applications, understanding the underlying detection technology verifies ideal performance and code-compliant installation. Passive infrared (PIR) sensors detect body heat movement within a typical 120° angle and 10-20 feet range, making them ideal for standard closets. However, motion sensor limitations include potential blind spots in L-shaped spaces and sensitivity issues with minimal movement. Motion sensor placement optimization requires mounting sensors to cover entry points while avoiding obstructions from shelving or hanging garments. Adjustable sensitivity settings allow you to fine-tune activation thresholds, preventing nuisance triggering from air currents or pets. For larger closets, consider multiple sensor-light pairings to provide thorough coverage. Microwave sensors offer detection through thin materials but are less common due to higher costs and potential false activations in residential applications. The PLT LED Closet Light provides easy installation to standard J-boxes with included mounting hardware such as screws and wire nuts for quick setup. Motion-activated lights typically feature auto-off timers that deactivate the fixture after a preset duration, such as 20 seconds, to conserve energy and extend battery life.
Key Advantages of Automated Closet Lighting Systems
Automated closet lighting systems combine motion sensor technology with energy-efficient fixtures to deliver measurable operational benefits. You’ll reduce electricity consumption through on-demand activation and automatic shutoff, while LED components extend service life beyond 25,000 hours. These systems amplify safety by eliminating manual switch operation in confined spaces and minimizing fire risks associated with lights left on accidentally. The built-in PIR sensor detects infrared radiation to trigger illumination when movement occurs within range, then automatically shuts off after 30 seconds of inactivity. Motion sensor integration enables seamless voice assistant control when connected to smart home platforms, allowing you to adjust settings without physical interaction. LED lights provide focused directional illumination that concentrates light exactly where needed in your closet space, eliminating wasted light output and improving visibility of clothing and accessories.
Convenience and Energy Savings
| Benefit Category | Operational Impact | Measured Result |
|---|---|---|
| Convenience | Hands-free activation | No manual switching required |
| Energy Reduction | Automated shutoff | 26% average savings |
| Fixture Longevity | Reduced operating hours | Extended lamp lifespan |
Installation simplicity supports retrofit applications across existing fixtures, while ease of use guarantees consistent performance. You’re reducing both electricity costs and maintenance frequency through automated control integration with LED-compatible systems. Motion sensor lights ensure illumination when needed, preventing energy waste from lights left on unnecessarily in unoccupied spaces. The hands-free operation capability makes motion sensor lights particularly attractive for smart home automation applications where seamless user experience is prioritized. Advanced sensor integration technologies now enable battery life optimization through intelligent detection algorithms that minimize false triggering events.
Safety and Longevity Benefits
Beyond energy efficiency and convenience, motion-activated closet lighting delivers critical safety improvements that protect occupants and property. Augmented safety standards emerge through automated systems that eliminate manual switch operation, reducing electrical hazards and contamination risks from repeated contact. You’ll benefit from improved maintenance protocols as reduced operational hours extend component lifespan considerably.
Critical Safety and Longevity Advantages:
- Accident Prevention, Immediate illumination eliminates fumbling in darkness, preventing trips and falls while keeping your hands free for safe entry and exit.
- Fire Risk Mitigation, Automated shut-off prevents overheating from forgotten lights, while LED integration generates minimal heat compared to incandescent alternatives. Advanced sensors can adjust light intensity based on ambient conditions, further reducing thermal buildup and electrical strain.
- Extended System Lifespan, Reduced on-time cycles deliver up to 25,000 operational hours, minimizing replacement frequency and lowering long-term maintenance costs. Motion sensor systems contribute to responsible resource management through automated regulation that ensures lights activate only when needed. Customizable sensitivity settings allow users to optimize detection ranges for different closet sizes, preventing false activations that would unnecessarily cycle the system.
Energy Savings and Cost Benefits Over Time
When you install occupancy sensors for closet lighting, you’ll typically achieve energy savings between 25% and 75%, with storage spaces often reaching the upper end of this range due to infrequent access patterns. Your payback period will generally fall between 2 and 4.2 years, depending on installation costs and electricity rates. At commercial rates around $0.08/kWh, you’ll realize ongoing utility expense reductions that compound throughout the sensor’s lifespan. To optimize future savings opportunities, set time delays between 2.5 and 5 minutes rather than the standard 10, 20 minutes, this adjustment can more than double your energy reduction. Your annual cost savings will range from 5¢ to 20¢ per square foot, with closets delivering some of the highest returns due to their minimal occupancy duration and frequent light-left-on scenarios. The growing adoption of automated lighting solutions is driving the motion sensor closet light market to expand at a 9.4% annual growth rate through 2033, reflecting widespread recognition of these efficiency benefits. Pairing motion sensors with LED light bulbs will further maximize your energy efficiency, as these combinations leverage both automatic activation and reduced power consumption per illumination cycle.
Passive Infrared Detection and How It Responds to Movement
Passive infrared sensors detect motion by monitoring changes in thermal radiation across their field of view, making them ideal for closet lighting applications where human presence must trigger immediate illumination. The dual-element pyroelectric design responds to differential heat signatures, activating your lights within milliseconds when you enter the space.
Key Detection Characteristics:
- Sensor field of view responds most effectively to lateral movement across the detection zone rather than direct approach to the unit
- Ambient temperature effects can reduce sensitivity when your body temperature closely matches surrounding conditions, requiring proper sensitivity calibration
- Signal processing circuitry amplifies only significant thermal changes, filtering out minor fluctuations from HVAC systems or sunlight
You’ll achieve excellent performance by positioning sensors to capture cross-movement patterns and adjusting sensitivity settings to match your closet’s environmental conditions. These sensors function effectively even in complete darkness since they detect infrared radiation rather than visible light, ensuring reliable operation regardless of existing lighting conditions in your closet.
Choosing Between Battery-Powered and Hardwired Options
Although both lighting systems illuminate your closet effectively, you’ll need to evaluate installation complexity, operating costs, and maintenance requirements before selecting between battery-powered and hardwired options. Battery-powered units install without electrical modifications; you’ll mount them using adhesive strips or screws, eliminating shock hazards and wall damage. Hardwired fixtures require access to household wiring, often necessitating a licensed electrician. Cost considerations include periodic battery replacement versus continuous utility consumption; battery-powered models incur no electricity charges but demand routine maintenance. Hardwired systems provide consistent brightness and long-term reliability without battery servicing. Product aesthetic preferences influence your choice; battery units offer wireless, discrete mounting, while hardwired fixtures enable recessed installation for seamless integration. Both options accommodate motion sensors and energy-efficient LED technology, though battery-powered lights deliver superior placement flexibility.
Step-by-Step Guide for Installing Wireless Motion Sensor Lights
Installing wireless motion sensor lights requires systematic preparation to guarantee satisfactory performance and safety compliance. Proper surface preparation confirms ideal adhesion and long-term stability, while systematic installation prevents detecting false triggers from environmental factors.
Installation Sequence:
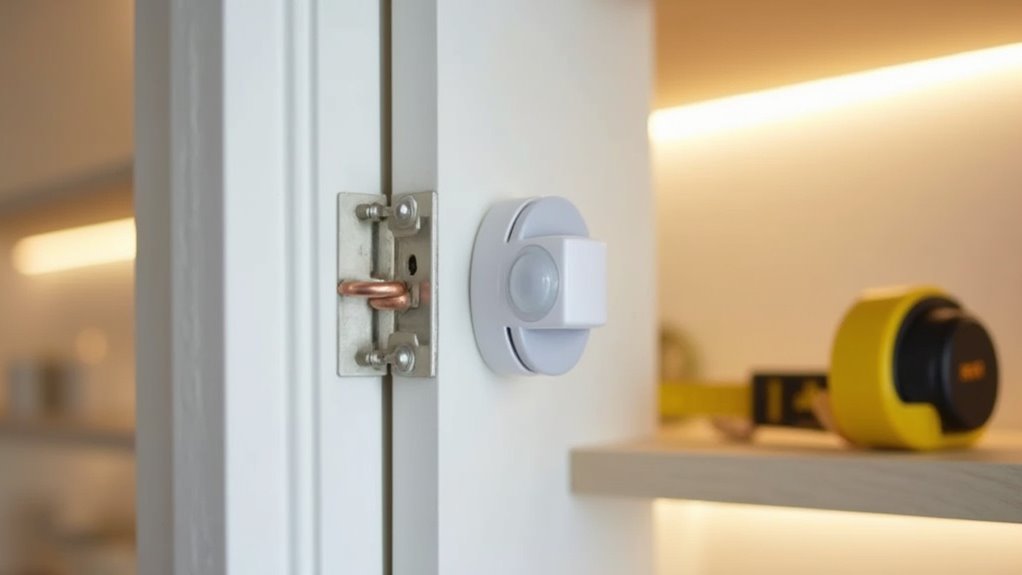
- Surface Preparation and Mounting – Clean the mounting area thoroughly, removing dust and grease. Apply adhesive backing or drill anchor holes according to manufacturer specifications, confirming the unit won’t wobble after installation.
- Power Activation and Initial Testing – Insert fresh batteries following polarity markings, activate the power switch, and verify immediate sensor response by walking through the detection zone at varying speeds.
- Sensor Calibration – Adjust sensitivity settings to prevent false activations from clothing movement or air currents. Set appropriate duration times and fine-tune the detection angle to cover entry points effectively.
Hardwired Installation Process and Electrical Considerations
Installing hardwired motion sensor lights requires identifying accessible power sources near your closet, typically from adjacent room circuits or attic electrical lines. You’ll cut power at the breaker panel, install junction boxes at connection points, and run 14-gauge wire to both the switch location and light fixture. After making proper color-coded connections and securing all components, you’ll test the circuit to verify correct motion detection zones and lighting activation before restoring full power.
Locating Power and Safety
Before you begin hardwiring closet lighting, you’ll need to identify a suitable power source and confirm your existing electrical infrastructure can support the supplementary load. Identifying nearby power sources typically involves locating outlets, switches, or light fixtures in adjacent rooms that share walls with your closet. You’ll also need to assess circuit capacity requirements by checking if the existing circuit can handle the additional electrical load without tripping breakers or creating fire hazards.
Essential safety steps include:
- Shutting off the correct circuit breaker at your electrical panel before touching any wiring to prevent shock
- Using 14-gauge wire for standard residential circuits to meet code compliance and guarantee proper current handling
- Testing all connections with a voltage tester after installation but before restoring power to validate safe operation
Wiring and Junction Box
| Connection Type | Wiring Method |
|---|---|
| Hot (Black) | Black-to-black with wire nuts |
| Neutral (White) | White-to-white, pigtail if needed |
| Ground (Green/Bare) | Connect to box and all grounds |
Follow wiring code requirements: shut off power at the breaker, verify with a voltage tester, and guarantee all splices remain inside the covered junction box with no exposed copper.
Testing and Adjustment
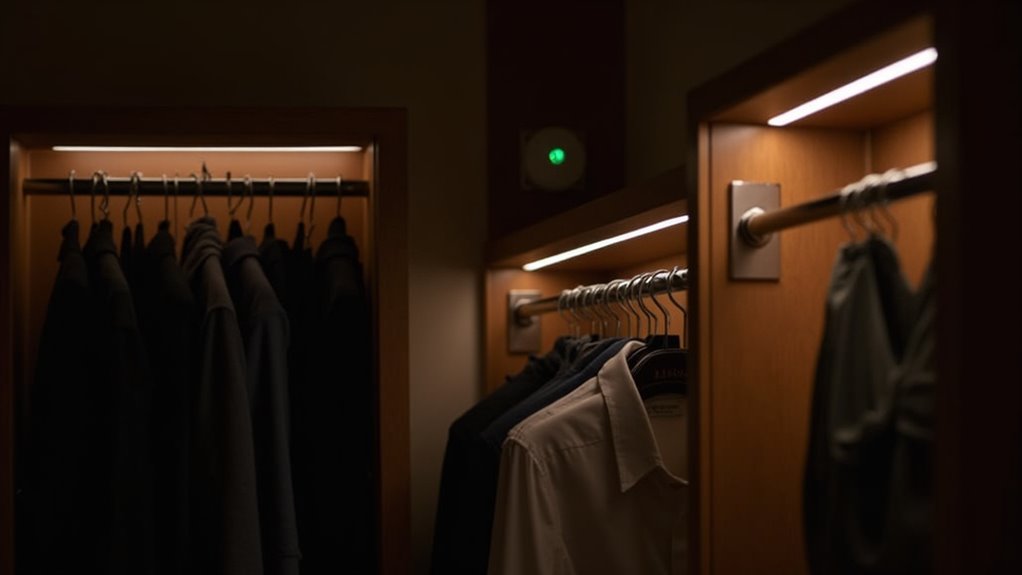
Once you’ve completed all wiring connections and secured the junction box cover, restore power at the circuit breaker to begin sensor functionality testing. Walk through the closet at different angles to confirm detection within the sensor’s 90° to 180° range. Observe LED indicators for activation confirmation and verify the light fixture responds correctly.
Sensor calibration techniques require methodical adjustment:
- Sensitivity Dial: Reduce detection range to prevent false triggers from adjacent rooms while maintaining reliable activation at closet entry points.
- Timer Setting: Set delay-off between 15 seconds and 2 minutes based on typical usage patterns.
- Detection Zone: Place temporary obstructions in the sensor’s field to identify blind spots requiring repositioning.
False trigger troubleshooting involves systematically lowering sensitivity until unwanted activations cease while preserving responsive detection during legitimate closet access.
Optimal Sensor Placement for Maximum Detection Coverage
Proper sensor placement determines whether your closet lighting system activates reliably or frustrates you with missed triggers and inconsistent performance. For standard reach-in closets, mount PIR sensors 6, 8 feet high facing the entry path, guaranteeing ideal field of view coverage. Walk-in closets require ceiling-mounted 360° sensors at 7, 8 feet for extensive detection. Wall-mounted installations at 5.9 feet provide extended 19-foot detection ranges compared to 16 feet at ceiling heights of 7.8 feet.
Angled mounting in corners optimizes coverage while maintaining clear line-of-sight paths. Avoid positioning sensors near heat sources, vents, or behind obstructions like hanging clothes that block infrared detection. For sliding-door configurations, test detection through door gaps before finalizing placement. Multi-entry closets may require multiple sensors to eliminate blind spots and maintain consistent activation throughout the space.
Adjusting Sensitivity Settings and Timer Duration
After installing your closet motion sensor, you’ll need to calibrate its detection range by adjusting sensitivity settings to match your space’s dimensions and usage patterns. Higher sensitivity detects subtle movements but may trigger false activations, while lower sensitivity requires more deliberate motion and reduces unnecessary lighting cycles. You must also configure the auto-off timer duration to balance energy efficiency with practical illumination time; shorter intervals (1-5 minutes) suit quick closet visits, whereas longer durations (10-20 minutes) accommodate extended organizing tasks.
Calibrating Motion Detection Range
While most motion-activated closet lights ship with factory default settings, you’ll achieve ideal performance by calibrating the detection range to match your specific space configuration. Minimizing false triggers requires systematic adjustment through your device’s programming mode.
Calibration Protocol:
- Enter programming mode by pressing and holding the designated button for 5 seconds until LED indicators activate, then cycle through sensitivity levels (low/medium/high) using successive button presses.
- Test detection boundaries by moving at varying distances within the closet, confirming the sensor activates only within your desired coverage zone while ignoring adjacent hallway movement.
- Document final settings and verify sensor positioning guarantees unobstructed line-of-sight across the detection field, accounting for hanging garments and shelf configurations that may create blind spots.
Optimizing sensor positioning eliminates unnecessary activations while maintaining reliable performance.
Setting Auto-Off Timer Length
Once you’ve positioned and calibrated your motion sensor, configuring the auto-off timer duration guarantees the lighting system matches your actual usage patterns while maximizing energy efficiency. Most switches offer preset durations, typically 1, 5, 10, or 20 minutes, selected through flexible programming options accessed by holding designated buttons. Enter programming mode by pressing specified button combinations; visual indicators confirm active settings. Cycle through timer options by repeatedly pressing the adjustment button, with each duration indicated by light blinks. Shorter intervals (1 minute) suit compact closets for maximum savings, while longer durations prevent premature shutoffs during extended use. Simultaneously adjust sensitivity settings within the same programming mode, customizing activation thresholds to match room size and movement patterns. This prevents false triggers or missed activations. Exit programming by holding the save button until steady confirmation light appears, ensuring settings are stored.
Common Issues and Practical Solutions for Reliable Operation
Motion sensor closet lights can fail to perform reliably when environmental factors, installation errors, or component issues interfere with proper operation. You’ll need to address these challenges systematically to guarantee consistent performance.
Key troubleshooting steps include:
- Adjust sensitivity settings to prevent false triggers from minor air movement while maintaining responsiveness to actual motion events
- Relocate sensors away from windows and direct sunlight where environmental conditions compromise photosensitive threshold accuracy and cause daytime activations
- Eliminate electrical interference sources by separating motion detectors from HVAC vents, competing light sources, and high-voltage circuits that disrupt infrared detection
Regular maintenance, including sensor lens cleaning, battery replacement, and wiring inspection, prevents hardware degradation. Test mode functionality helps verify proper operation after adjustments, ensuring your closet lighting system activates reliably when needed.
Frequently Asked Questions
Can Motion Sensor Closet Lights Work in Walk-In Versus Reach-In Closets?
Motion sensor closet lights work effectively in both closet types, but you’ll need different approaches. For walk-in closets, you’ll require broader detection angles and proper installation placement on ceilings or upper walls to guarantee consistent sensor coverage across larger spaces. In reach-in closets, you can mount sensors near entrances with narrower focus ranges. Battery-powered units offer code-compliant solutions for both, though walk-in installations demand higher lumen output and adjustable sensitivity settings for reliable performance.
Do Motion Sensors Trigger Accidentally From Pets or Air Movement?
Motion sensors can trigger from pets if they’re mounted too low or if animals climb into the detection zone. Most PIR sensors ignore pets under 40 pounds through pet movement detection algorithms, but multiple animals or rapid motion may still activate them. Air movement rarely causes false triggers in infrared sensors unless extreme temperature fluctuations mimic body heat. You’ll minimize accidents by installing sensors four to five feet high and avoiding placement near pet-accessible furniture or HVAC vents.
Are Motion Sensor Lights Compatible With Existing Dimmer Switches?
Most standard motion sensors aren’t compatible with existing dimmers due to electrical conflicts that cause flickering or failure. You’ll need a dedicated motion-sensing dimmer switch like Lutron Maestro or Leviton Decora that combines both functions safely in one unit. These code-compliant devices offer compatibility with smart home systems, guarantee proper load handling, and deliver energy-saving benefits through automated dimming. Never install separate motion sensors and dimmers in series; it creates safety hazards and voids warranties.
What Happens if Multiple People Enter the Closet Simultaneously?
When multiple people enter simultaneously, the motion sensor provides simultaneous detection through its wide-angle field (typically 120°+), activating lighting for all occupants at once. The system doesn’t distinguish individual users; it simply detects any motion within range. For effective occupancy management, you’ll need proper sensor placement to avoid obstructions from shelving or doors. The timer resets with continuous movement from any person, ensuring lights remain on until all occupants exit and motion ceases.
Can I Use Motion Sensor Lighting in Closets With Mirrored Doors?
Yes, you can use motion sensor lighting in closets with mirrored doors, but you’ll need to address mirrored door interference carefully. Reflective surfaces may cause false triggers or missed detection. Focus on sensor placement considerations by mounting the unit above the entry or on the ceiling, pointing downward to minimize reflection issues. Battery-powered options avoid code complications and let you adjust positioning easily. Test coverage thoroughly and guarantee the sensor maintains a clear line of sight.