You’ll start by measuring your closet’s dimensions and cataloging your wardrobe to determine storage needs. Next, you’ll design a layout allocating 60-75% for hanging and 25% for shelves, positioning frequently used items at eye level. Then select durable materials like hardwood or plywood, cut components with precision tools, and assemble using pocket screws and wood glue. After applying protective finishes, you’ll mount boxes securely to wall studs and organize items by frequency. The detailed guide below reveals professional techniques for maximizing every inch.
Assessment and Planning Your Closet Space
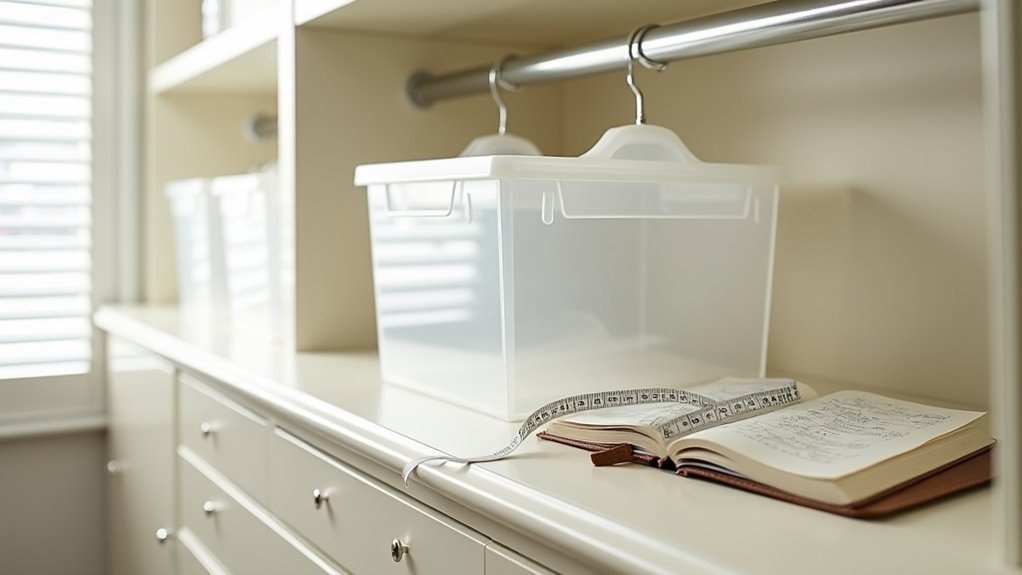
How much hanging space do you actually need? Start by measuring your closet floor-to-ceiling and wall-to-wall to document every inch of usable area. Next, conduct a thorough inventory count of your clothing, accessories, and footwear, this reveals your actual storage capacity requirements.
Digital wardrobe cataloging tools streamline this process, letting you organize items by frequency of use: daily essentials, seasonal pieces, and formal wear. Virtual closet visualization apps help you map configurations before installation, ensuring ideal placement for your lifestyle. These platforms leverage AI-powered styling algorithms to suggest optimal organization patterns based on your wardrobe composition and usage habits.
Assess bulk items like winter coats and formal gowns, they’ll dictate hanger spacing and box dimensions. Consider non-apparel needs too: linens, accessories, multipurpose storage. The closet storage market offers Metal Organizers, Plastic Organizers, Wood Organizers to accommodate different weight capacities and aesthetic preferences. For flexibility in open-plan living spaces, explore modular closet systems with customizable components that adapt to changing needs. This data-driven approach eliminates guesswork, creating a custom hanger box system that enhances efficiency and adapts as your wardrobe evolves.
Conceptualizing the Layout and Design
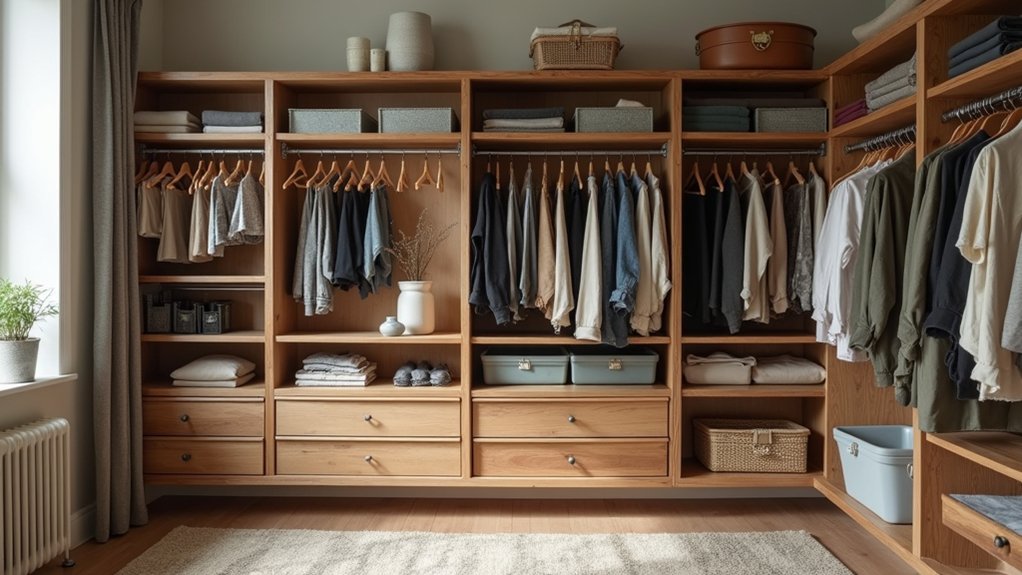
Begin your layout by dividing the closet into functional zones, assign specific areas for short-hang garments like blouses, long-hang items such as coats, and specialty storage for accessories. You’ll optimize vertical space by implementing double-rod systems at 40, 42″ and 80, 82″ heights, effectively doubling your hanging capacity within the same footprint. Draw the available closet space to determine the room dimensions before selecting storage components. Plan for adjustable shelving and modular components from the start, ensuring your hanger boxes can adapt as your wardrobe needs change over time. Consider that the basic structure can be modified to accommodate different closet dimensions and storage preferences for each user. Download the Measuring Guide to ensure accurate dimensions throughout your planning process.
Zoning by Function
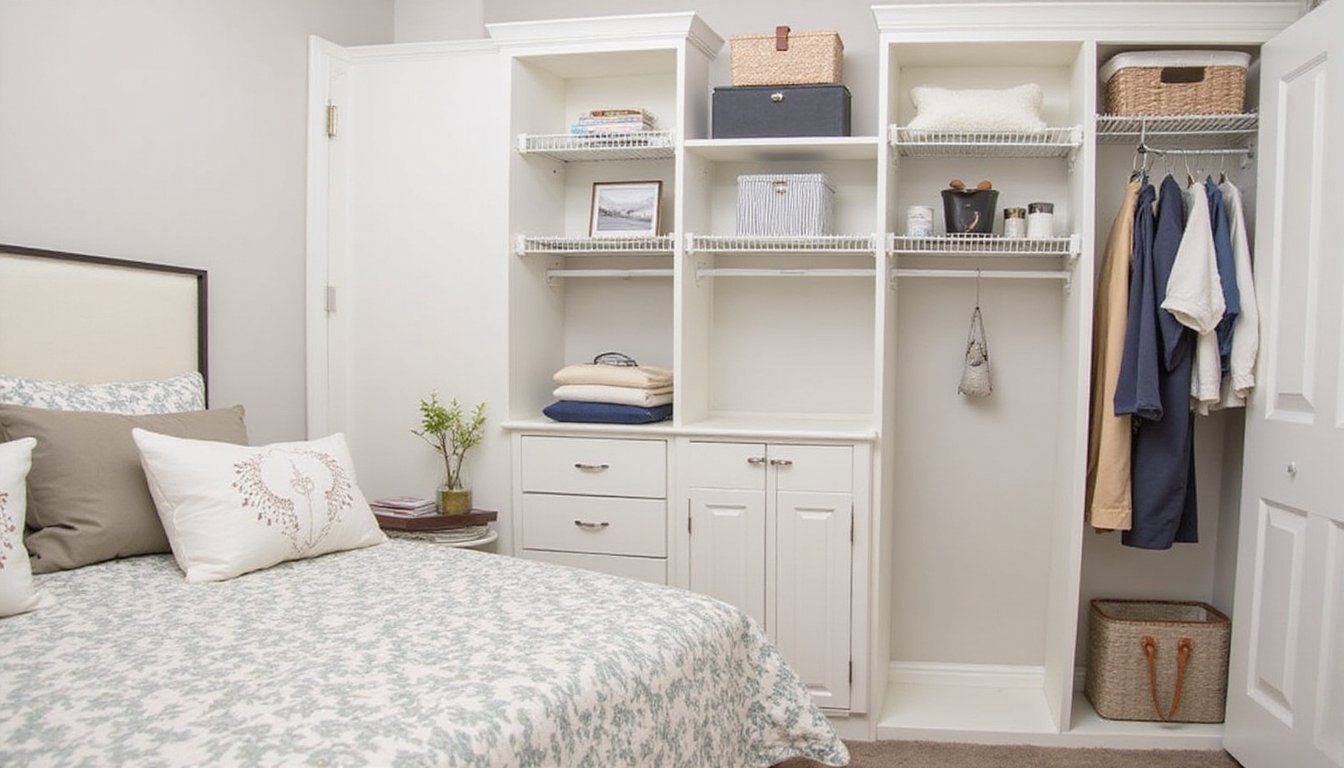
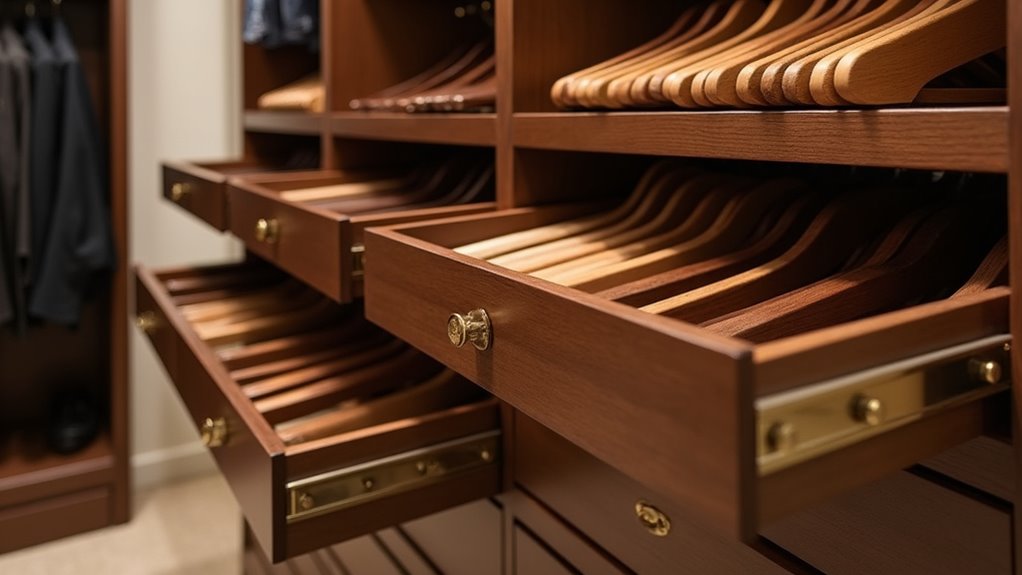
When designing custom hanger boxes for closets, zoning by function transforms chaotic storage into an efficient, purpose-driven system. You’ll divide your space into dedicated sections, allocating 60, 75% to hanging (50% double hang, 25% long hang) and 25% to shelves and drawers. Position frequently accessed items at eye and waist level, reserving upper shelves for seasonal pieces. Space hanging items precisely: 1″ for shirts, 1.25″ for pants, 2, 3″ for jackets. Guarantee 48″ clearance for single rods and 36″ for double rods to support comfortable movement. Integrate accessory zones near mirrors, optimizing lighting placement for functionality. Use 3/4-inch plywood for load-bearing components and chrome rods positioned 12″ from walls, maximizing visual clarity while maintaining structural integrity throughout each zone. Incorporate soft-close hardware on drawer units to prevent slamming and enhance safety during daily use. Plan shelving depth between 14-24 inches to accommodate folded clothing items comfortably without wasted space. Establish clear sections for different garment types to create logical organization patterns that streamline your daily routine and reduce decision fatigue.
Maximizing Vertical Space
Functional zoning establishes the horizontal framework, but capitalizing on vertical dimensions accesses your closet’s full storage potential. Custom hanger boxes integrate seamlessly with strengthened shelving systems, allowing you to install additional tiers above or below primary hanging rods. This utilization of high shelves accommodates off-season items or infrequently accessed garments, extending storage nearly to ceiling height. Incorporation of stackable organizers within these boxes creates efficient layering without expanding footprint, secure lids guarantee stable stacking while clear containers enable quick content identification. Double-hanging rods multiply your hanging capacity within the same vertical span, and cascading hangers further optimize rod space. You’ll also benefit from placing drawers or bins beneath hanging zones, employing typically underutilized floor-level areas. Adjustable wall-mounted configurations let you customize heights, balancing accessibility with maximum floor-to-ceiling capacity.
Planning Adjustable Components
Before installing any custom hanger boxes, you’ll need to map your closet’s dimensions with precision that accounts for every obstruction, vents, outlets, light fixtures, and baseboards that reduce usable space. Once measurements are confirmed, design adjustable components that adapt to changing storage demands:
- Select modular shelving with pre-drilled holes enabling multi-level repositioning without specialized tools
- Incorporate sliding rods and retractable organizers that expand accessibility while maintaining clearances for hanger movement
- Choose integrated mounting hardware engineered for frequent adjustments, prioritizing durable track systems and reinforced brackets
User centric controls, like labeled slots and marked increments, streamline future reconfigurations. Your layout should designate functional zones for hanging, folding, and accessories while considering traffic flow. Plan component heights for universal reachability, ensuring every adjustment point remains accessible and intuitive. Systems built with premium, furniture-grade materials deliver both durability and aesthetic appeal throughout the closet space. A customizable modular design provides flexibility in layout and arrangement, allowing for easy modification as your storage needs evolve. Complementary accessories such as wire pant rack pullouts offer heavy gauge chrome construction with moveable fingers for exceptional closet organization and unparalleled convenience.
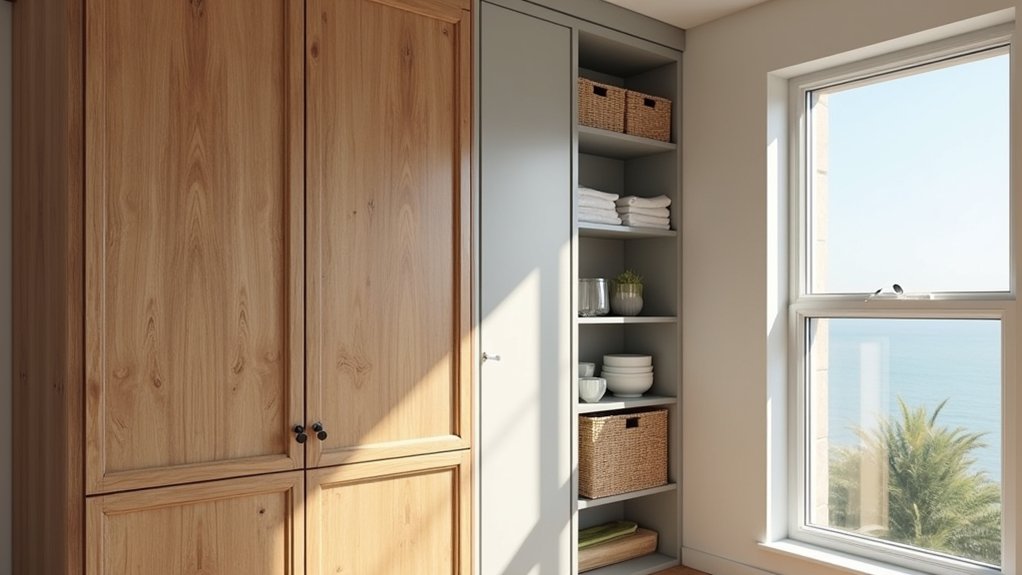
Selecting the Right Materials
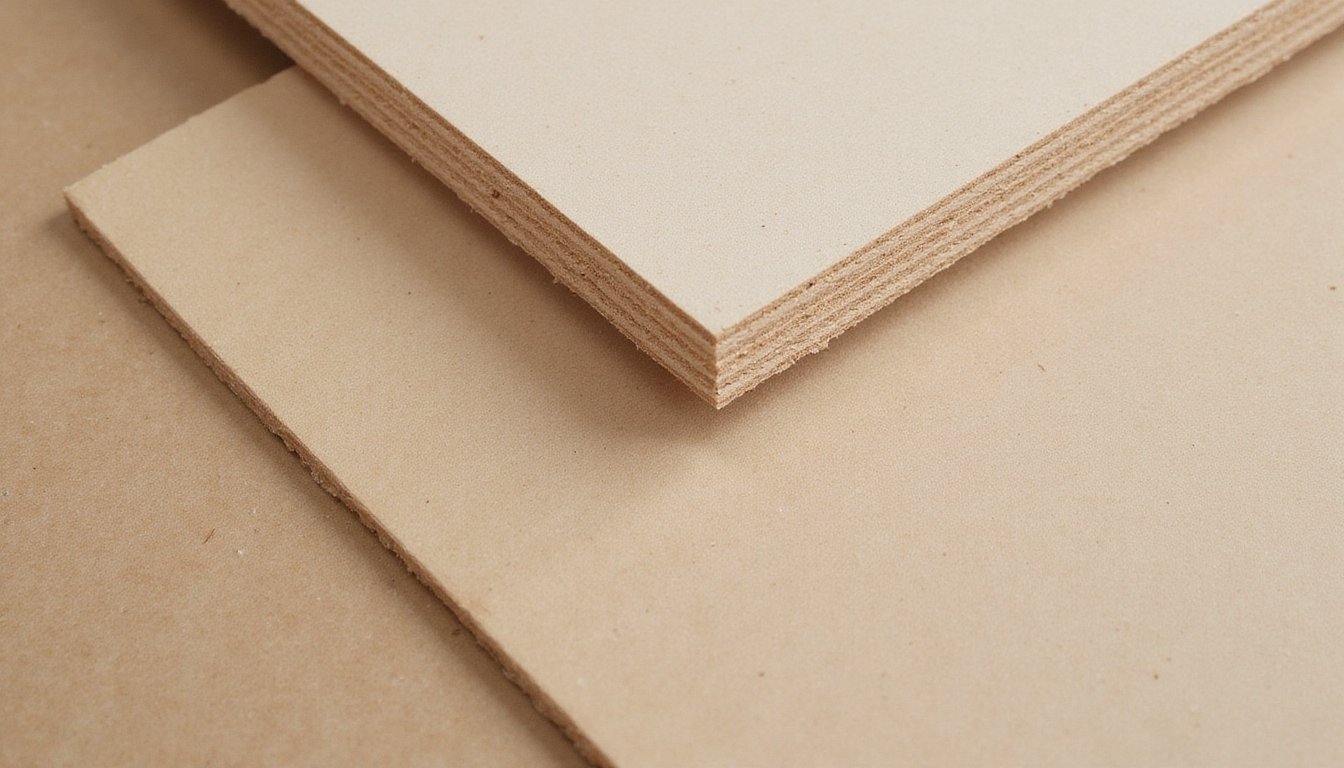
Why does material selection matter so much for custom hanger boxes? Your choices directly impact durability, aesthetics, and long-term performance. Solid hardwoods like oak or maple deliver superior load-bearing strength, while plywood resists warping under heavy use. For budget-conscious projects, MDF provides smooth finishes ideal for paint, though it lacks extreme load capacity.
Cabinet construction techniques influence material pairing; combining MDF boxes with hardwood fronts balances cost and visual appeal. Melamine and laminates offer scratch resistance and easy maintenance in high-traffic closets. Material sourcing considerations include FSC-certified woods and low-VOC finishes for healthier indoor air quality.
Metal hardware in stainless steel or brass guarantees structural integrity. Standard sheet sizes minimize waste, while veneer surfaces replicate premium wood grain affordably. Match your material to anticipated loads and closet aesthetics.
Fabricating Custom Boxes to Specifications

Fabricating custom boxes to specifications demands precision cutting that translates your measurements into exact panel dimensions, ensuring each piece fits seamlessly within your closet’s unique footprint. You’ll achieve professional results by applying edge banding to visible plywood edges, which conceals raw material while adding durability to high-contact surfaces. Your assembly process relies on square cuts and proper joinery techniques, where pocket screws and wood glue create rigid structures that withstand daily use without warping or separation.
Precision Cutting and Assembly
Every successful custom hanger box begins with precise cuts that translate closet plans into physical components. You’ll use precision marking techniques with speed squares and guides to guarantee every panel matches your specifications exactly. Power tools like circular saws and miter saws deliver straight, repeatable cuts, while jigsaw tool usage handles curves or outlet cutouts when necessary.
Your assembly process follows a methodical sequence:
- Join sides initially using pocket hole screws and wood glue for invisible, reinforced connections
- Add base and top panels while clamping pieces flush to prevent warping
- Install dividers and cleats for load distribution before securing boxes to wall studs
You’ll check each assembly for square and plumb, ensuring structural integrity that optimizes your closet’s storage potential.
Edge Finishing Techniques
Once your custom hanger box assembly is complete, you’ll need to address the raw edges that can compromise both appearance and durability. Start with 400-grit sandpaper to remove fabric fuzz and surface irregularities. For superior edge protection, apply multiple coats of edge sealant with intermediate sanding between layers, building protective depth that resists moisture penetration and wear.
Water burnishing techniques followed by canvas polishing create glass-like smooth surfaces. Sequential burnishing with brown tokenol followed by color-matched finishing compounds achieves uniform edge coloration throughout your box. Apply gum tragacanth as a glossing agent while maintaining non-adhesive properties.
For decorative options, metallic foiling creates electrostatic barriers against moisture, while aqueous coatings provide water-resistant protection specifically designed for vulnerable edge areas.
Finishing and Preparing for Installation
After cutting and assembling your custom hanger boxes, proper finishing transforms raw plywood into closet components that’ll last for years. Surface preparation begins with filling all screw holes and sanding surfaces smooth, random orbit sanders handle flat areas efficiently while hand sanding reaches tight corners. You’ll need three essential finishing steps:
- Apply wood stain for color consistency across your entire closet system
- Add three coats of water-based polyurethane to high-use surfaces for durability
- Attach veneer edge tape with a household iron to cover raw plywood edges
Your quality control inspection includes verifying square alignment, checking dimension consistency, and testing hardware functionality. Pre-drill all mounting points now, this prevents wood splitting and accelerates installation day greatly.
Installing Boxes Into Your Closet
Your finished hanger boxes need three critical prep steps before installation begins. Initially, locate and mark wall studs for securing fasteners that’ll support maximum load capacity. Draw level lines at 82″ height for track placement, positioning support rails 2″ below your desired system top. Mount brackets directly to studs, spacing them no more than 32″ apart.
Position assembled boxes onto mounted tracks, distributing weight evenly across all support points. Use cam locks and bolts to anchor shelving and rods at both ends, preventing lateral movement. For floor-mounted systems, adjust feet to compensate for uneven surfaces while ensuring level alignment throughout.
Verify all fasteners attach directly to studs or reinforced anchors. Check plumb and level before loading garments, maintaining proper clearances for hanger movement.
Final Adjustments and Organization
Before loading your closet with garments, recheck all box dimensions against your actual closet space to catch any gaps or alignment issues. Test each unit with a spirit level to confirm plumb and true alignment. Secure fastening to wall studs or reinforced panels guarantees long-term durability, especially for stacked configurations or heavy storage loads.
Always verify measurements, check level alignment, and anchor to studs before loading, precision now prevents costly adjustments later.
Optimize your system with these strategies:
- Group by frequency: Place daily-wear items at eye level, seasonal pieces higher or deeper
- Add dividers: Subdivide interiors for accessories, shoes, or folded garments
- Install visibility aids: Use clear fronts or cutouts so you’ll spot contents instantly
Wipe all surfaces clean post-installation, smooth any rough edges, and add felt pads beneath boxes to protect the flooring. Reassess spacing after initial use to refine accessibility.
Frequently Asked Questions
How Long Does the Entire Design and Installation Process Typically Take?
The entire design process flow typically takes 6-10 weeks from consultation to completion. You’ll spend 1-2 weeks in initial consultations and design mockups, followed by 3-6 weeks for manufacturing your custom components. The installation timeline adds another 1-4 days, depending on your closet’s complexity. This efficient sequence guarantees you’ll receive precisely measured, quality-controlled storage solutions that optimize your space. You can expect minor adjustments during post-installation support to perfect your custom system.
Can Custom Hanger Boxes Be Easily Removed or Relocated Later?
Yes, you can remove and relocate custom hanger boxes with basic tools like drills and pliers. Customizable mounting options, including track systems and cam-lock hardware, allow for straightforward disassembly. You’ll need to fill previous screw holes with spackle and repaint. Flexible repositioning capabilities depend on your system type; modular components relocate easier than wall-to-wall installations. Mark stud locations when removing hardware, as they’re ideal mounting points. Pre-drilled components and adjustable brackets enable precise repositioning in new spaces.
Do Custom Closet Boxes Increase Home Resale Value?
Yes, custom closet boxes substantially improve your home’s resale value by delivering increased storage space and amplified organization that buyers actively seek. You’ll see an average ROI of 50%, adding $1,100-$1,500 to your home’s worth. These built-in solutions create efficient, decluttered environments that appraisers recognize as premium upgrades. Since 72% of millennials pay more for high-end storage features, you’re investing in a competitive advantage that attracts serious buyers and generates stronger offers.
What Warranty or Guarantee Comes With Custom Hanger Box Installation?
You’ll typically receive a custom hanger box warranty covering defects in materials and workmanship, ranging from 90 days to lifetime protection. Your custom hanger box quality guarantee includes manufacturer-backed hardware coverage and remedy through repair or replacement. However, you must maintain proof of purchase and avoid unauthorized modifications. Improved warranties often provide free technical support and component replacements, excluding finishes and normal wear. Contact customer service before initiating claims to verify defect eligibility and streamline your resolution process.